| Main |
| About |
| Pics |
| Rap |
| Tips |
| Contact |
| Tutorial (for producers) |
| Seanz Miniz |
| |
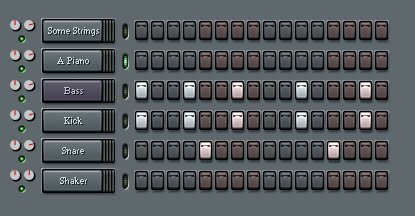
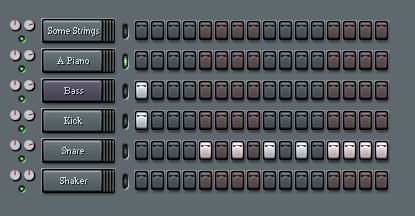
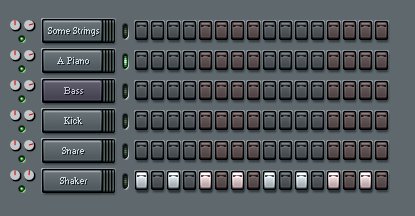
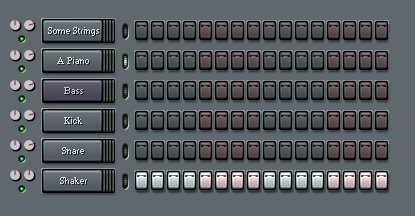
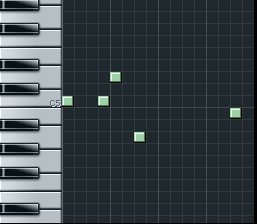
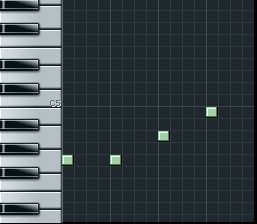
If you've listened to your beat long enough, you'll notice that after a while that it's boring and may even become annoying. That is natural, so don't start just randomly doing stuff to it, you may mess it up and hurt my feelings. This is where patterns come in handy. Whatever software or hardware you use will probably support patterns. If not, bomb the company with e-mails complaining that your sequencer isn't really a sequencer and that you'd like your money back, that you probably never paid anyway since any sequencer like that isn't worth anymore than a peer-to-peer download. However, this issue has been addressed to me in terms of Reason which does not support patterns in the same way as FruityLoops does. So, to use this tutorial correctly, imagine the patterns I will explain to you as different patterns in your sequencer, and use you're amazing "copy and paste" skills to simulate it. With the patterns, you will make basic changes to the original beat, but in my old style. My old style and my new style are somewhat similar, but my old one is less complicated, a lot less delicate, and doesn't involve as much thinking, tinkering, and experimenting, as well as my old style being much darker than it is now. First of all, remember that in order to turn a beat into a full length song, you need to break it up into it's simplest forms. What do I mean by that? Well, I don't mean giving every step its own pattern. That would be stupid and wasteful. I mean by having a few drum (kick, snare, and possibly bass) patterns, a few hat patterns (maybe the every other step one and another be every step, or varied steps), and separate patterns for every instrument in the melody. Separating it like this allows you to delete and add different parts to get rid of any and all monotony in your beats. To do so, we would first have to separate the main beat that we have now, but this isn't always easy. When you become more experienced, it'll be like a second nature to you. I'll try to simplify it into the drums first, then the hats, then the melody. So, first things first. Let's begin by looking at the first pattern we've already made. Now, to vary that, you could always get rid of a kick, add a kick, change the snares, whatever you want to do. It all depends on your style. For the sake of this tutorial, you'll follow my old style. All of these patterns will be at the bottom of this step, so go ahead and read along so that you understand the process, then you can add the patterns in. So, go to the next pattern. Fill in your snares like you did in the first pattern. Then, get rid of the last half of the kicks and add two snares. Then, go to pattern three, use only the first of the kicks and use snares the rest of the way. I hope you didn't try to follow that, but if you did, well, kudos to you. Now for the hats. Go back to the first pattern and copy or cut that hats pattern. Then go to pattern four and insert or paste that. Be sure to clear out the hats in the first pattern afterwards if you have not done so already. Then, make pattern five into a hat pattern also, but this time fill in all of the hat's steps. Now, we move onto the melody. The best way to describe this is to go back to the first pattern, cut or copy the piano pattern, and then insert or paste it in pattern six. Don't forget to clear it from pattern one if you haven't already. Then, in pattern seven, make that melody lower, but end with the same note as the first. And in pattern eight, make it very simple and be a transition basically. I'll touch a little bit on transitions later too. So, there you have it. This is NOT the beat yet, but here's all of the patterns we just made: PATTERN 1 BASS X - - X - - X - - - X - - - X - KICK X - - X - - X - - - X - - - X - SNARE - - - - X - - - - - - - X - - - | |